
TL;DR:
- DIY pinball cabinet restoration requires safety precautions, proper materials, and surface preparation.
- Structural repairs involve wood reinforcement, fiberglass rebuilding, and careful joint reinforcement for durability.
- Choosing between restoration and replacement depends on damage extent, with restoration preserving authenticity and replacements offering speed.
A beloved classic pinball machine deserves better than a cracked, faded cabinet gathering dust in a corner. Whether you’re working on a vintage Addams Family or a worn-out Williams title, cosmetic and structural damage can quietly erode both the play experience and the machine’s collector value. The good news is that hands-on restoration is well within reach for dedicated hobbyists, and the results can be genuinely stunning. This guide walks you through every major stage, from gathering materials and addressing safety concerns to painting, finishing, and deciding when a modern replacement might actually make more sense.
Table of Contents
- Gather your materials and ensure safety
- Structural repairs: restore, reinforce, or replace
- Surface preparation: the key to lasting results
- Painting and finishing: restore the factory look
- Modern alternatives: restoration versus replacement
- Expert perspective: the restoration journey that matters most
- Upgrade your collection with confidence
- Frequently asked questions
Key Takeaways
| Point | Details |
|---|---|
| Prioritize safety | Always use proper protective equipment and work outdoors to avoid lead paint hazards. |
| Repair before repainting | Structural fixes come first to ensure your paint job lasts and the cabinet stays sturdy. |
| Surface prep matters | Clean, sand, and prime thoroughly for professional-looking results. |
| Use durable finishes | Two-part auto paints and careful layering create a long-lasting, authentic appearance. |
| Consider your goals | Choose between restoration and replacement based on budget, authenticity, and project enjoyment. |
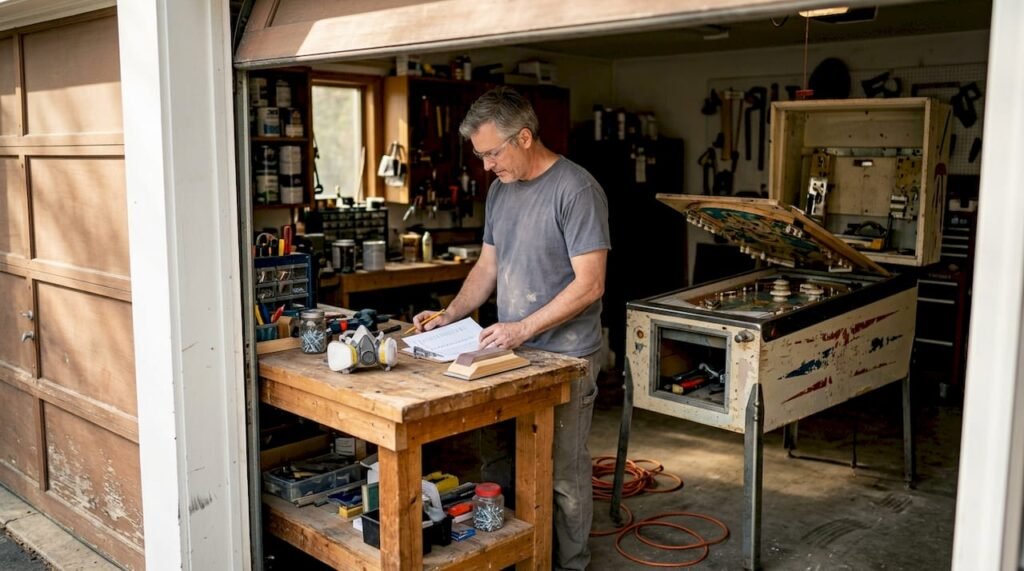
Gather your materials and ensure safety
Once you’re aware of the risks and rewards of DIY cabinet restoration, the first step is making sure you have everything you need and are set up for safe success. Preparation is where most hobbyists either win or lose the project before it even begins.
Older cabinets require outdoor sanding with a respirator because lead paint is a genuine hazard in machines manufactured before the late 1990s. Never skip this step, even if the cabinet looks like it has been repainted before. Layers of old finish can trap hazardous materials that become airborne the moment you start sanding.

Here is a breakdown of what you will need:
Essential tools and materials
- Orbital sander and sanding blocks (80, 120, and 220 grit)
- Full-face respirator rated for lead dust and chemical vapors
- Nitrile gloves and safety glasses
- Wood clamps and bar clamps
- Titebond III or equivalent waterproof wood glue
- Fiberglass resin and hardener
- Bondo body filler
- Sealing primer and 2-part automotive primer
- Semi-gloss automotive paint (black for most vintage cabinets)
- Spray gun or quality rattle cans
- Milk crates for propping the cabinet during corner repairs
| Supply category | Purpose | Priority level |
|---|---|---|
| Respirator and PPE | Lead paint and fume protection | Critical |
| Sanding tools | Surface prep and paint removal | High |
| Fiberglass resin | Wood reconstruction | High |
| Automotive primer | Adhesion and bleed-through prevention | High |
| Spray equipment | Smooth, even finish | Medium |
Always work outdoors or in a space with strong cross-ventilation. Dispose of sanding debris and old paint chips in sealed plastic bags according to your local hazardous waste guidelines. You can also review pinball home use safety considerations before setting up your workspace, especially if children or pets are nearby.
Safety note: Never sand a vintage cabinet indoors without industrial ventilation. Lead contamination is invisible and cumulative. Treat every pre-2000 cabinet as if it contains lead paint.
Structural repairs: restore, reinforce, or replace
With your gear and safety sorted, it’s time to address any structural issues that could affect play or longevity. A cabinet that looks rough on the outside often has hidden joint failures, rotted corners, or missing wood sections that need attention before any cosmetic work begins.
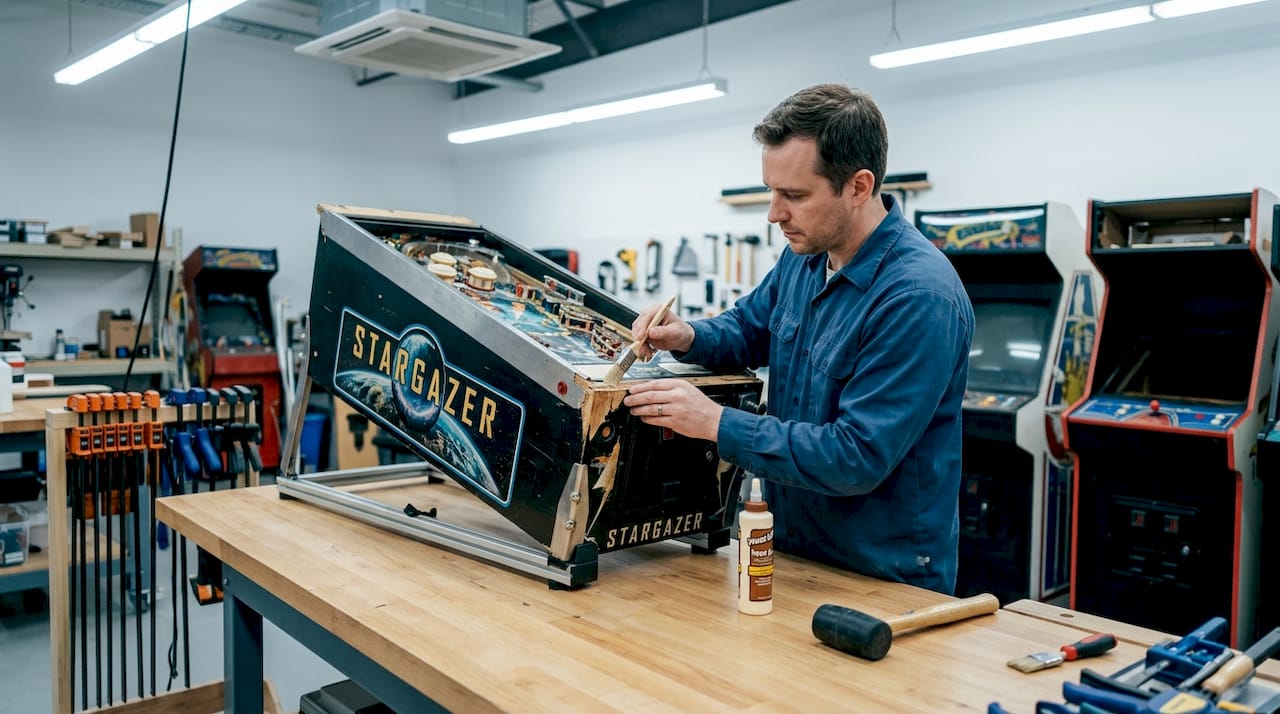
Fiberglass resin rebuilds missing wood sections effectively: sand away flaky paint, insert small screws to form a dam around the void, mix resin with hardener, fill the area, let it cure fully, then sand flush. This technique is especially useful for lower cabinet edges that have suffered moisture damage or impact chips.
Here is a step-by-step approach for corner and joint repairs:
- Inspect all four corners for separation, cracking, or softness.
- Clean out any loose debris or crumbling wood fiber from the joint.
- Apply Titebond III generously into the open seam.
- Clamp firmly and reinforce with counter-sunk screws driven at angles across the joint.
- Once cured, fill any remaining voids or screw holes with Bondo or fiberglass resin.
- Sand the repaired area flush with the surrounding surface.
For cabinet bottom replacement, measure the interior footprint carefully, cut a new panel from 3/4-inch birch plywood, and dry-fit before gluing. Clamp the new bottom in place and allow 24 hours of cure time before moving the cabinet.
Pro Tip: Prop the cabinet on milk crates during corner repairs so the weight of the machine does not stress fresh glue joints while they cure. This simple trick prevents the most common cause of failed repairs.
If the damage is truly extensive, covering more than 30 percent of the cabinet’s surface area, exploring [pinball cabinet parts](https://premiumpinballs.com/understanding-pinball machine parts) for pre-cut replacement sections or considering a full CNC cabinet swap may save you significant time. Moving a severely damaged cabinet also carries its own risks, so review safe transport practices before you relocate the machine for repairs.
Surface preparation: the key to lasting results
Once the cabinet is structurally sound, the most important factor for a showroom finish is thorough surface preparation. Paint that goes over a poorly prepped surface will peel, bubble, or show every flaw underneath within months.
Follow this sequence for reliable results:
- Sand the entire exterior with 80-grit paper to remove loose or flaking paint.
- Switch to 120-grit to smooth out the rough scratches left by the coarser paper.
- Fill any remaining pits, staple holes, or low spots with Bondo, let cure, and sand flat.
- Wipe the cabinet down with a tack cloth to remove all dust.
- Apply a sealing primer to prevent bleed-through from staples, knots, or resin patches.
- Follow with two coats of 2-part automotive primer, sanding lightly between coats with 220-grit.
| Primer type | Best use case | Dry time |
|---|---|---|
| Sealing primer | Knots, staples, resin patches | 30 to 60 minutes |
| 2-part automotive primer | Full surface adhesion base | 1 to 2 hours per coat |
| High-build primer | Deep scratches and low spots | 2 to 4 hours |
Pro Tip: Run your bare hand across the primed surface before painting. If you feel any texture or ridges, sand again. Your fingertips are more sensitive than your eyes and will catch imperfections that will show through the final paint coat.
Ventilation and temperature matter enormously during this stage. Ideal conditions are between 65 and 80 degrees Fahrenheit with low humidity. Cold or damp conditions slow drying times and can cause primer to lift or wrinkle when topcoat is applied too soon.
Painting and finishing: restore the factory look
Now that you’ve achieved an even, primed surface, it’s time to restore your cabinet’s color, graphics, and overall presence with the right painting methods. This is where your restoration transforms from a repair project into a genuine showcase of craftsmanship.
Two-part automotive paints deliver the durability and depth that single-stage paints simply cannot match. Semi-gloss black was the factory standard for the majority of classic American pinball machines, and matching that sheen is important for both authenticity and resale appeal.
Key considerations for painting your cabinet:
- Spray over brush every time. A spray gun or quality aerosol delivers a smooth, even coat that brushes cannot replicate on large flat surfaces.
- Apply thin coats. Two or three thin passes beat one heavy coat, which will sag and run.
- Protect existing artwork. If original decals or side art remain intact, mask carefully with automotive masking tape and paper before spraying.
- Use stencils for logos or graphics. Cut stencils from adhesive vinyl for crisp, repeatable results on manufacturer logos or score displays.
- Allow full cure before reassembly. Two-part paints can feel dry to the touch in hours but need 48 to 72 hours to fully harden before hardware is reattached.
For those interested in how cabinet feature finishes affect overall machine presentation, the relationship between paint quality and perceived value is significant. Operators and collectors alike recognize a properly finished cabinet immediately, and the investment in quality paint pays dividends in both enjoyment and resale positioning.
Humidity above 70 percent will cause paint to blush or cloud. Always check conditions before you spray, and never rush the process.
Modern alternatives: restoration versus replacement
Before you commit to a major restoration project, consider whether a modern replacement might accomplish your goals more efficiently, and how each option impacts resale and collector value.
A new CNC cabinet is often cheaper than a full restoration when damage is severe, because precision-milled replacement cabinets eliminate the labor-intensive repair stages entirely. However, the decision is rarely that simple.
| Factor | Full restoration | New CNC cabinet |
|---|---|---|
| Cost (labor + materials) | $300 to $800+ | $400 to $700 |
| Authenticity for collectors | High | Moderate |
| Time investment | 40 to 80+ hours | 10 to 20 hours |
| Durability of result | Varies with skill | Consistently high |
| Resale appeal | Strong for purists | Acceptable for operators |
Purists strongly prefer original components and authentic finishes, while commercial operators often prioritize durability and speed over historical accuracy. Both perspectives are valid, and the right choice depends on your goals.
If you’re restoring for personal enjoyment and collector credibility, hands-on restoration wins. If you’re refurbishing machines for a commercial route or arcade environment, a CNC replacement cabinet paired with quality paint may be the smarter investment. Explore why CNC cabinet technology has advanced so significantly, and weigh that against the advantages of refurbished playfields when making your final call. You can also compare refurbishing versus replacing for a broader perspective on the economics involved.
Expert perspective: the restoration journey that matters most
Having weighed both restoration and replacement, it’s worth stepping back and asking what restoration actually means to the pinball community at its core.
Most guides focus on technique, and technique matters enormously. But Pinside’s Vid’s Guide stands apart because it treats restoration as a craft, emphasizing the mechanics of resin repairs and joint routing rather than pointing hobbyists toward commercial services. That philosophy resonates deeply with us.
Restoring a cabinet is not just about aesthetics. It’s about preserving a piece of gaming history, developing skills that transfer to every future project, and building a genuine connection with the machine you’re bringing back to life. There is something irreplaceable about running your hand across a cabinet you repaired yourself and knowing exactly what lies beneath the paint.
What most guides overlook is the value of community wisdom. The shortcuts that save hours, the material combinations that hold up for decades, and the safety habits that protect your health all come from experienced hobbyists sharing hard-won knowledge. Lean into that community. Read the forums, ask questions, and never underestimate the restoration advantages that come from doing the work yourself with proper guidance.
Be meticulous about safety and originality in equal measure. The machines worth restoring deserve both.
Upgrade your collection with confidence
With restoration skills in hand, you might be inspired to take your collection even further. Whether you’ve just completed your first cabinet repair or you’re looking to add a professionally refurbished machine to complement your work, Premium Pinballs has you covered.
We carry an exceptional selection of refurbished, used, and new premium machines, each vetted for quality and ready to become the centerpiece of any game room or arcade. Explore the benefits of refurbished pinballs to see how professional restoration compares to DIY work, or browse our inventory to discover what makes a pinball machine truly worth owning. For operators and collectors seeking standout titles, our curated list of top arcade pinball machines is the perfect starting point.
Frequently asked questions
Is it safe to restore vintage pinball cabinets with original paint?
Restoring vintage cabinets is safe when you treat every pre-2000 machine as a lead paint risk, work outdoors, and use a proper respirator and nitrile gloves throughout the sanding process.
How do I fix large pieces of missing wood in a pinball cabinet?
Use fiberglass resin mixed with hardener over a screw-formed dam to rebuild missing sections, allow full cure, then sand flush before priming.
Should I restore my original cabinet or buy a new CNC-milled one?
Restoring preserves authenticity and collector value, while a new CNC cabinet is often faster and sometimes cheaper for machines with severe structural damage.
What paint should I use for pinball cabinet restoration?
Two-part automotive paint in a semi-gloss finish most closely matches the original factory appearance and delivers superior long-term durability compared to single-stage or brush-applied options.
How can I avoid my restored cabinet developing warping or planking?
Store the cabinet away from damp environments, prop it on milk crates during repairs to relieve stress on fresh joints, and allow all repairs to cure completely before reassembly or painting.