
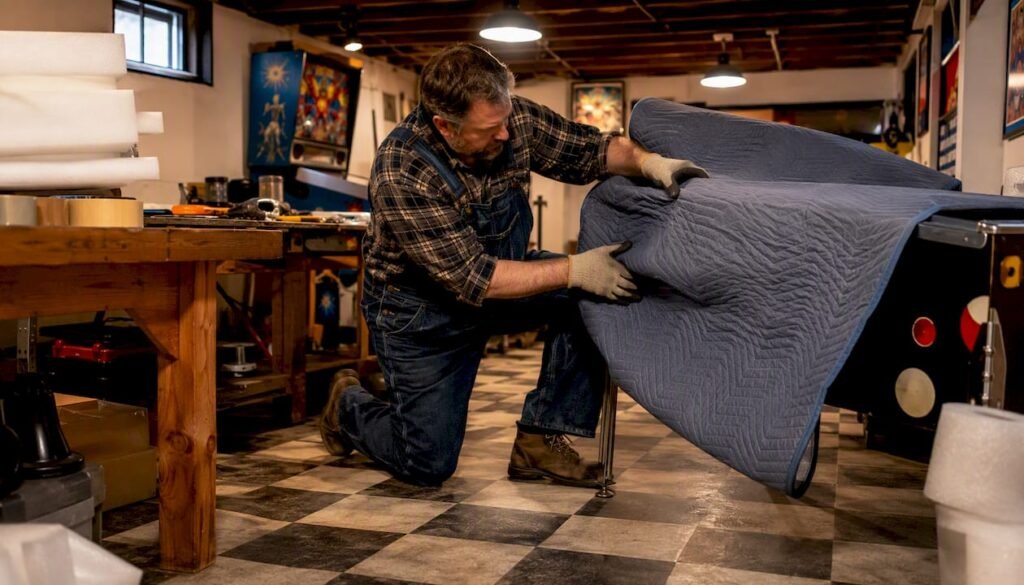
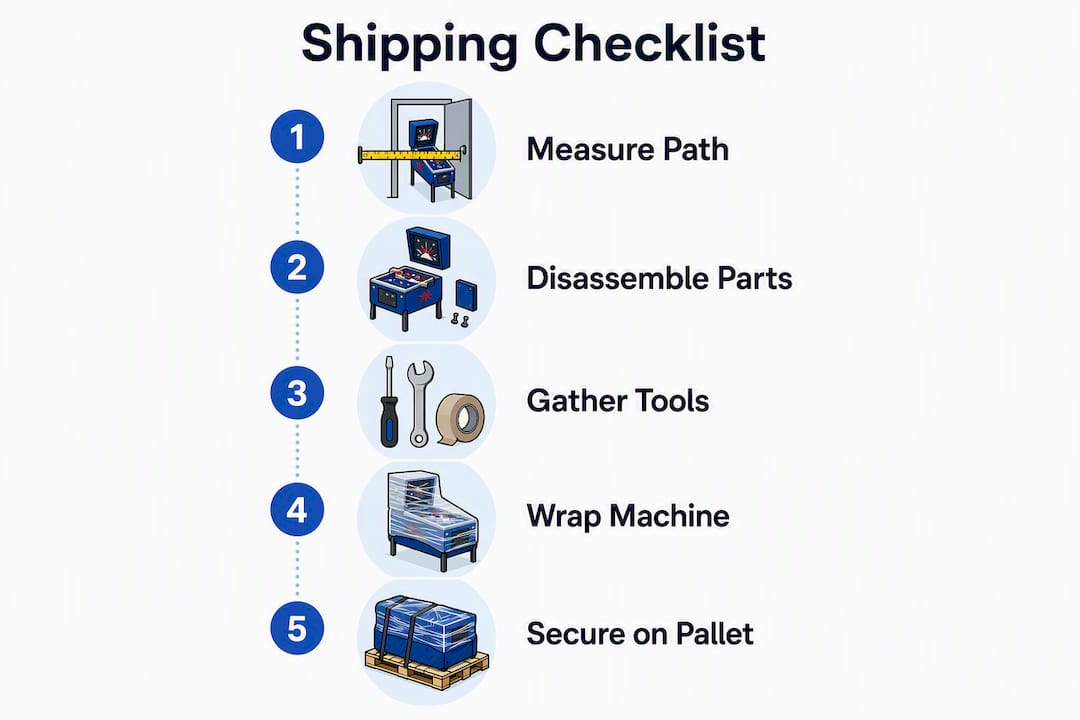
A prioritized, printable pinball delivery checklist is the single most effective defense against transit damage — and knowing upfront whether to hire a professional or handle the move yourself saves both money and heartache. Here is your quick-reference list before you read the full guide:
Printable Pre-Shipment Checklist (Top 8 Must-Dos):
- Remove playfield glass and pack it separately
- Remove all pinballs from the playfield
- Fold or detach the backbox and label every connector
- Bag all small hardware and store the bag inside the coin door
- Photograph and video the entire machine (exterior, playfield, serial number)
- Remove legs or leave them on and screw the cabinet to a reinforced pallet
- Wrap with moving blankets, add corner protectors, and ratchet-strap the cabinet
- Confirm declared value and insurance with your carrier before pickup
DIY vs. Professional Freight: Handle it yourself or with a local mover for short, single-floor moves of lower-value machines. Hire a professional freight or white-glove service for long-distance shipments, high-value collectibles, or any delivery involving stairs, tight landings, or complex access points.
Pro Tip: Film a short walk-around video of the machine before it leaves your hands. Still photos miss hairline cracks and subtle damage that video catches — and carriers respond faster to video evidence in a claim.
Table of Contents
- Does your delivery path actually fit the machine?
- How to disassemble, label, and secure removable parts
- What materials and tools do you need before packing?
- How do you palletize a pinball machine for freight?
- Loading, transport, and handling best practices
- Which shipping method is right for your pinball machine?
- What should you check when the machine arrives?
- How do storage and environment affect a machine in transit?
- What mistakes do most people make, and how do you avoid them?
- Key Takeaways
- Why the checklist matters more than the carrier
- Premiumpinballs makes delivery and setup straightforward
- Useful sources and further reading
Does your delivery path actually fit the machine?
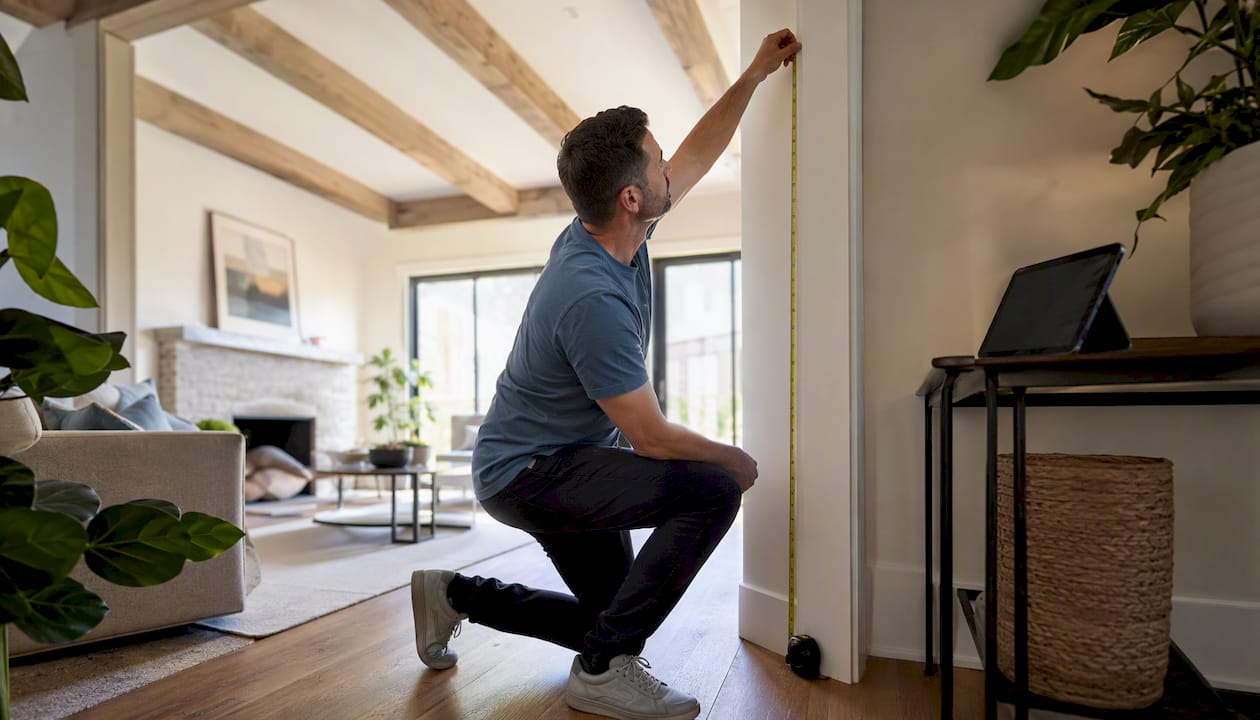
Measuring the machine itself is only half the job. Full path measurement — doorways, hallways, stair widths, landing depths, and 90-degree turn clearances — is where most failed moves begin. A machine that fits through the front door can still be stopped cold by a narrow stair landing or a low-hanging light fixture.
What to measure on the machine
A standard pinball cabinet runs approximately 28.5" wide × 52" deep × 75.5" tall with the head up. With the head folded, overall height drops significantly, but the diagonal width of the cabinet during a turn is what catches people off guard. Measure the diagonal corner-to-corner distance of the cabinet body, not just the width, before you plan any turn.
What to measure on the path
- Every doorway: width and height (including the door frame, not just the opening)
- Hallway width at the narrowest point
- Stair width between handrails, not wall to wall
- Landing depth: can you set the machine down and pivot?
- Ceiling height on stairwells and landings
- Elevator interior dimensions (width, depth, and door clearance)
- Screen door swing radius and threshold height
Non-obvious clearances trip up even experienced movers: handrails that protrude 4–6 inches into the stair width, stair overhangs that catch the cabinet base, and low-hanging light fixtures above landings. Walk the full path with a tape measure and take reference photos. Some movers tape the machine’s footprint on the floor at each turn to simulate the pivot before the machine ever leaves the room.
Pro Tip: Fold the backbox before measuring height clearances. A machine with the head up can exceed 6 feet and will not clear standard 80-inch door frames.
How to disassemble, label, and secure removable parts
Disassembly done right takes about 30 minutes and prevents hours of troubleshooting after delivery. Work through these steps in order:
- Remove the playfield glass. Vibration and road stress can shatter it mid-transit, and broken glass causes collateral damage to the playfield surface and plastics. Pack it separately in a padded sleeve or flat between two moving blankets.
- Remove all pinballs. Loose balls roll under ramps, jam mechanisms, and dent playfield inserts. Pull every ball and bag them.
- Remove the coin box and any loose trays. These rattle and can damage wiring harnesses.
- Fold the backbox down if the hinge allows it. For detachable-backbox machines, label and disconnect the large keyed connectors and pack the head separately, strapped and padded.
- Photograph all wiring before disconnecting anything. A quick phone photo of each connector cluster takes 60 seconds and eliminates reassembly guesswork entirely.
- Label every connector with painter’s tape and a marker. Match labels on both sides of each connection.
- Secure internal moving parts. Lock the tilt bob with a zip tie, tape down any loose ramps or toys, and bag small plastics.
- Place all hardware bags inside the coin door. Labeled ziplock bags stored inside the coin door travel with the machine and cannot be separated from it in transit.
Pro Tip: Photograph the serial number plate during this step. Carriers and insurers require it for claims, and it is easy to forget once the machine is wrapped.
What materials and tools do you need before packing?
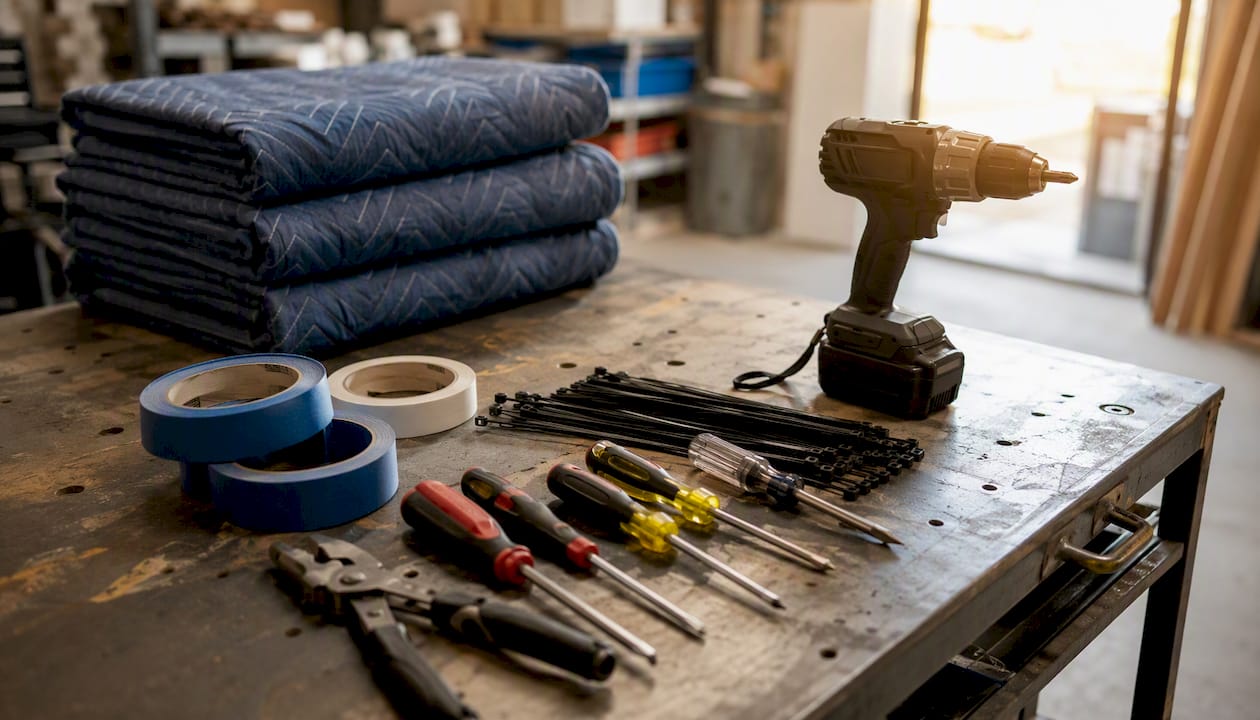
Gather everything before you start. A mid-pack run to the hardware store is how corners get cut.
Essential packing materials
| Item | Purpose | Notes |
|---|---|---|
| Moving blankets (4–6) | Wrap cabinet exterior | Heavy-duty preferred; furniture pads work |
| Corner protectors (4+) | Protect cabinet corners | Cardboard or foam; replace after one use |
| Pipe insulation foam | Pad rail edges and legs | Inexpensive; cuts to length easily |
| Heavy-duty ratchet straps (2–4) | Secure cabinet to pallet | Minimum heavy working load |
| Shrink wrap (1 roll) | Lock blankets in place | Wrap over blankets to prevent slipping |
| Desiccant packs (4–6) | Control moisture inside crate | Critical for long-distance or humid-season moves |
| Reinforced pallet | Base for freight shipment | 48" × 40" standard; confirm weight rating |
| Pallet screws and washers | Attach cabinet to pallet | 3-inch deck screws with fender washers |
Tools
Wrench set (for leg removal), screwdriver set (Phillips and flathead), a drill for pallet screws, zip ties, painter’s tape, a permanent marker, and small ziplock bags for hardware.
Pro Tip: Cheaper moving blankets are fine for a local move. For LTL freight, invest in professional-grade pads or rent them from your carrier — the machine will be handled by multiple people at multiple hubs.
For a broader look at the equipment used in professional machine moves, the arcade machine moving guide at Premiumpinballs covers dollies, straps, and pallet setups in detail.
How do you palletize a pinball machine for freight?
Palletizing keeps the machine upright, protects it from forklift damage, and gives carriers a stable base to handle. For most domestic shipments, a reinforced pallet is sufficient. A full wooden crate is worth the extra effort for high-value machines, cross-country hauls, or any shipment with multiple handling points.
Step-by-step palletizing sequence
- Remove legs or leave them on, depending on cabinet height and carrier requirements.
- Set the cabinet upright on a reinforced 48" × 40" pallet rated for the machine’s weight.
- Drive 3-inch deck screws with fender washers through the pallet base into the cabinet bottom rails to prevent any lateral shift.
- Apply pipe insulation or foam padding to all four top corners and along the top rail.
- Wrap the cabinet in moving blankets and secure with shrink wrap.
- Run two ratchet straps over the cabinet (front-to-back and side-to-side) and tighten firmly.
- Place desiccant packs inside the coin door before final wrap.
- Photograph and video the finished pallet before the carrier picks it up.
Pro Tip: Avoid running straps through forklift slots — forks can cut them. Run straps over the top of the cabinet and screw the loose strap end down with a screw and washer so it cannot be removed at an intermediate hub.
| Scenario | Palletize | Full Crate |
|---|---|---|
| Local move, single handler | Optional | Not needed |
| LTL freight, regional | Recommended | Optional |
| LTL freight, cross-country | Required | Strongly recommended |
| High-value or rare machine | Required | Required |
| Multiple handling points | Required | Required |
Even
do not remove your responsibility for proper prep. Good palletizing is the primary damage defense regardless of which service you choose.
Loading, transport, and handling best practices
The right equipment matters more than the number of people on the job. A stair-friendly appliance dolly with a strap keeps the machine controlled on stairs; brute force without a dolly is how cabinets tip and people get hurt. Professional movers consistently recommend keeping the machine strapped low to the dolly to maintain a low center of gravity throughout the move.
Loading and transport checklist:
- Use a stair-friendly appliance dolly for any stairs; use a pallet jack for flat surfaces
- Keep the machine upright at all times — never lay it on its back or side
- Strap the cabinet to the dolly before moving, not after
- Tell the carrier explicitly: “upright only, no stacking, no forklift forks through the cabinet”
- Place the pallet against the truck wall and strap it to the wall anchor points
- Pad any contact points between the machine and the truck wall
- For open-bed trucks, cover with a weather-resistant tarp secured at all corners
Temperature and humidity swings inside a truck bed are a real risk, particularly in summer heat or during cold-weather hauls. A machine sitting in a hot trailer for hours can experience the same damage as improper storage. Desiccant packs inside the crate help, but climate-controlled transport is worth requesting for long-distance moves of high-value machines.
Pro Tip: When loading onto a truck, back the dolly up the ramp rather than pushing forward. It gives you more control and keeps the machine’s weight balanced behind you.
Which shipping method is right for your pinball machine?
Pinball machines typically weigh 250–350 pounds and measure roughly 28.5" × 75.5" × 52", which puts them well beyond parcel carrier limits. Your realistic options are LTL freight, white-glove freight, brokered pickup, or a local specialized mover.
| Service Type | Speed | Handling Level | Best For |
|---|---|---|---|
| White-glove freight | 5–10 days | Highest (inside delivery, placement) | High-value, long-distance, stairs |
| LTL freight | 3–7 days | Moderate (dock-to-dock or curbside) | Well-palletized machines, regional |
| Brokered pickup | Varies | Variable (depends on broker’s carrier) | Budget-conscious, flexible timeline |
| Local specialized mover | 1–2 days | High (direct, known handlers) | Short-distance, complex access |
Key cost drivers
Weight and freight class, distance, pickup/delivery complexity (stairs, inside delivery, liftgate), crating costs, and declared value all affect the final price. Inside delivery and stair carries add meaningful surcharges with most carriers.
Insurance and declared value
- Document the machine’s condition with photos and video before pickup — these are the foundation of any claim.
- Declare the machine’s full replacement value, not a low estimate to save on premiums.
- Understand the difference between carrier liability (often limited to a per-pound rate) and declared value coverage, which pays closer to actual value.
- Consider third-party freight insurance for high-value machines; standard carrier liability rarely covers full replacement cost.
- Keep the bill of lading, pre-shipment photos, and any inspection forms together in a single folder.
What should you check when the machine arrives?
Inspect before you sign. Once you accept delivery without noting damage, your claim options narrow significantly. Work through this sequence:
- Photograph the pallet and packaging before removing a single strap. Capture any visible damage to the crate or wrapping.
- Remove straps and blankets carefully, watching for loose hardware that may have shifted.
- Locate the parts bag inside the coin door and confirm all labeled bags are present.
- Inspect the exterior: cabinet corners, side art, coin door, and leg sockets for cracks or dents.
- Check the backglass and playfield glass for cracks before powering on.
- Inspect the playfield surface for any impact marks or loose plastics.
- Check internal wiring against your pre-shipment photos for anything that shifted or disconnected.
- Pre-power checks: confirm the power cord is grounded, check fuses visually, and look for any obviously loose wiring before plugging in.
- First boot: power on slowly, listen for unusual sounds, and check for any burning smell. If you detect either, cut power immediately.
If damage is found, isolate power, photograph everything in detail, and contact both the shipper and the carrier the same day. Detailed pre-shipment photos and video are what separate a successful claim from a disputed one. Note any damage on the delivery receipt before the driver leaves.
How do storage and environment affect a machine in transit?
Environmental stability matters more than most shippers expect. Unconditioned spaces expose machines to temperature and humidity swings that cause wood warpage, printed-art delamination, metal oxidation, and circuit board corrosion — damage that is permanent and expensive to reverse.
The primary risks during U.S. transit and short-term storage are:
- Temperature extremes: summer trailer heat above 100°F or winter cold below freezing both stress wood joints and electronics
- Humidity: high humidity causes wood to swell and promotes board corrosion; low humidity causes cracking and decal lifting
- Concrete slab moisture: direct contact with concrete wicks moisture into the cabinet base
- Pests: stored machines in garages or warehouses attract insects that nest in wiring harnesses
Mitigate these risks by using climate-controlled storage whenever possible, elevating the cabinet on a wood pallet (never directly on concrete), and placing desiccant packs inside the cabinet. Remove the backglass for any storage longer than a few weeks, as it is the most vulnerable panel to humidity cycling.
Short-term non-climate storage (a few days in a dry, shaded space) is generally acceptable in mild seasons. Avoid it entirely during peak summer heat or winter cold, and never store a machine in a space where temperatures swing more than 20–30°F in a single day.
Pro Tip: Always raise the cabinet off concrete on a wood pallet and add desiccant packs for any storage longer than a few days — even in what feels like a dry space.
What mistakes do most people make, and how do you avoid them?
The most costly errors in pinball machine shipping are not about strength or budget. They are about skipping steps that take five minutes each.
The single most preventable cause of transit damage is leaving pinballs inside the cabinet. Loose balls roll freely during transport, jam under ramps, crack playfield inserts, and damage solenoid assemblies. Remove every ball before the machine moves an inch. The second most preventable cause is failing to photograph the machine before pickup — without documentation, even legitimate damage claims are routinely denied by carriers.
Pro tips from experienced movers and collectors:
- Measure twice, move once. Path clearance failures are the number one reason a delivery gets stuck mid-move.
- Label connectors on both sides before disconnecting anything. Reassembly without labels can take hours.
- Use pipe insulation on the top rail and corners before strapping — ratchet straps bite into unprotected edges.
- Do not trust “white glove” implicitly. Premium services reduce handling points but do not replace proper prep. The machine still needs to be palletized and padded.
- Control beats strength. A single person with the right appliance dolly and proper strapping moves a machine more safely than four people lifting by hand.
For a complete step-by-step moving walkthrough, the how to move a pinball machine guide at Premiumpinballs covers the full sequence from prep to placement.
Key Takeaways
A properly prepared, palletized, and documented pinball machine arrives undamaged in the vast majority of shipments — the checklist, not the carrier, is your primary protection.
| Point | Details |
|---|---|
| Remove glass and balls first | Playfield glass and loose balls are the top causes of in-transit damage; remove and pack separately. |
| Document before pickup | Photos and video of the full machine, serial number, and wiring are required for any insurance claim. |
| Palletize and strap correctly | Screw the cabinet to a reinforced pallet, protect corners with foam, and secure straps so they cannot be cut at hubs. |
| Match service to the move | Hire white-glove or LTL freight for long-distance or high-value machines; local movers work for short, simple moves. |
| Premiumpinballs handles delivery | Premiumpinballs offers delivery, crating, and inside setup services — contact them before your next machine ships. |
Why the checklist matters more than the carrier
Most shipping damage to pinball machines is not caused by reckless carriers. It is caused by skipped prep steps — balls left inside, unpadded corners, connectors pulled without labeling, and pallets that were never screwed down. Carriers handle hundreds of freight items a day; they cannot compensate for a machine that was not properly secured before pickup.
The photograph-and-video step deserves more emphasis than it typically gets. Collectors who skip it often discover, after delivery, that they have no leverage with a carrier even when the damage is obvious. A 90-second walk-around video before the machine leaves your hands is worth more than any premium service upgrade.
One more thing worth saying plainly: the decision between DIY and professional freight is not primarily about cost. It is about access complexity and machine value. A $1,500 used machine going across town is a reasonable DIY move with the right dolly. A $7,000 collector’s edition going cross-country with stairs at both ends is not — and treating it like one is where the expensive mistakes happen.
Premiumpinballs makes delivery and setup straightforward
When you purchase a machine from Premiumpinballs, you are not left to figure out freight, crating, and inside setup on your own. Premiumpinballs offers delivery and inside setup services for residential and commercial buyers across the U.S., handling the palletizing, transport coordination, and placement so the machine arrives ready to play.
Whether you are adding a classic title like Addams Family to a home game room or outfitting an arcade with multiple machines, Premiumpinballs coordinates the logistics from the warehouse to the final location. To request a shipping or installation quote, have your delivery address, any access constraints (stairs, elevator, narrow hallways), and photos of the delivery path ready. The team uses that information to match the right service level to your specific setup.
Browse the current inventory and request delivery details on the pinball machines for sale page, or visit the machine moving guide for additional setup resources.
Useful sources and further reading
The sources below back the claims in this guide and offer deeper detail on specific topics.
| Source | What you will find there |
|---|---|
| ParcelPath — Shipping Pinball Machines | Weight/dimension data, carrier selection, and packing guidance for freight shipments |
| Allied Moving Resources — Moving a Pinball Machine | Path measurement checklist and connector labeling steps |
| Pinballadventures — How to Properly Store Your Pinball Machine | Climate, humidity, and storage environment guidance |
| Pinside — Shipment Prep Checklist | Community-sourced strap techniques and palletizing tips |
| Pinside — NAVL/STI Shipping Prep | Detailed strap-screw technique to prevent strap removal at hubs |
| Peak Pinball — Moving a Pinball Machine | Detachable-backbox handling and connector labeling for older machines |
| GameRoomInfo — Pinball Machine Weight | Weight ranges and dolly/handling recommendations |
Always consult your freight carrier’s own packing requirements before shipping — some carriers specify minimum pallet ratings, strap counts, or crating standards that affect liability coverage. Keep all documentation (photos, video, bill of lading, inspection forms) in one folder until the machine is confirmed undamaged and fully operational.